By Rowan Ashford, Kink Gear Educator and Rope Instructor
The first shopping cart is always the hardest. You know you're interested. You've done enough reading to understand the basics. Now you're staring at a retailer with hundreds of products and no idea where to start — and you don't want to spend $400 on things you'll never use, find mediocre, or have to explain to yourself six months later.
Here's how I approach this question when someone asks me at a workshop: forget the menu and build a kit. Not a collection of individual impulse purchases, but a deliberately assembled set of tools that covers the core categories — restraint, impact, sensation, safety — without overlap, redundancy, or wasted spend. Ten items, under $200 total, chosen so each one teaches you something and nothing duplicates another's function.
This guide walks through each item in turn: what it does, why it belongs in a starter kit, what to look for at each price tier, and what to avoid. I'll also tell you what to skip entirely on your first run — the things that feel essential in a product listing but are actually intermediate or specialist gear that you'll appreciate more after you know what you're doing. Before buying anything, spend ten minutes with our beginner's guide to BDSM safety and consent — it's the foundation that makes the gear actually work.
Budget assumption: $200 is a realistic starter number that gets you quality tools without disposable-junk compromises. Some items are $10; some are $40. The total doesn't have to hit $200 — stopping at $120 with five items that fit your specific interests beats buying ten things that don't.
Contents
- The starter kit framework
- Item 1–2: Restraints (wrists + ankles)
- Item 3: Blindfold
- Item 4: Light impact tool (paddle or flogger)
- Item 5–6: Sensation tools (pinwheel + candles)
- Item 7: Collar or bondage tape
- Item 8: Quality lubricant
- Item 9: Safety scissors
- Item 10: Aftercare kit
- Full price breakdown table
- What to skip on your first buy
- Cleaning and care basics
- What to buy first this month
- FAQ
The Starter Kit Framework
A good starter kit does three things: it covers multiple categories of play so you can discover what actually interests you; it includes safety gear from day one so good habits are built in; and it avoids gear that requires advanced skill before it becomes enjoyable.
The four categories
Every beginner kit should touch four functional areas:
- Restraint — controlling movement, creating the physical dynamic
- Sensation — modifying what the receiver feels, including impact, temperature, touch
- Psychological tools — gear that primarily works on the mind (blindfolds, collars)
- Safety infrastructure — scissors, safewords, aftercare materials
Beginners often overbuy in one category (usually restraints or impact toys) and neglect others entirely. The result is a lopsided collection that handles one type of scene but can't flex. A kit with one item from each category — even if each item is modest — gives you range.
What "beginner" means for quality
Beginner doesn't mean cheap. It means appropriate complexity. A beginner restraint system should be simple to apply and release, not require technique to operate. A beginner impact toy should give good feedback without requiring precision or arm conditioning. Skip anything that needs a learning curve to be safe; add those after you've built baseline competence.
Prioritize safety gear over fun gear
If you're choosing between a third sensation toy or safety scissors and an aftercare kit, buy the safety gear. You can improvise sensation with your hands. You can't improvise EMT scissors when something needs to come off quickly. Safety first is not a cliché in kink; it's operational.
Items 1–2: Restraints (Wrists + Ankles)
Restraints are the most foundational piece of kit and the one with the most variation in quality and safety. The goal for a starter pair: something that holds reliably, releases quickly, and doesn't cut into skin with normal pressure.
Wrist cuffs
Buy wrist cuffs before ankle cuffs. Wrist restraint is the most common use case and the best place to understand fit, tension, and quick-release mechanics before adding more attachment points.
What to look for:
- D-rings that are welded or solid, not split rings that can open under pressure
- Adjustable sizing — velcro or buckle closure with multiple positions
- Padding under the restraint surface (neoprene or fleece lining is best for beginners)
- At least one quick-release mechanism per cuff
- Width of at least 2 inches to distribute pressure across the wrist
Ankle cuffs
Same principles as wrist cuffs, but fit matters more — ankles vary more in circumference than wrists and a cuff that's too loose will slip; too tight will cut circulation. Buy a set that adjusts widely, or measure your ankle circumference before purchasing.
Price bands — restraints
| Tier | Price (pair) | What you get | Trade-offs |
|---|---|---|---|
| Budget | $15–25 | Nylon cuffs, velcro closure, single D-ring | Velcro wears quickly; D-ring may be split; minimal padding |
| Mid | $30–50 | Padded neoprene or leather-wrapped, buckle closure, welded D-rings | Best value tier; buckle takes a few seconds more to release |
| Premium | $60–100+ | Full leather, lined, metal hardware, swivel D-rings | Overkill for beginners; beautiful but adds no function at this stage |
Recommendation: Mid tier. A $35–45 padded neoprene set with buckle closure will outlast your beginner phase and give you reliable hardware without the premium price. Don't start at budget if you can stretch — the hardware quality difference between $20 and $40 is significant.
What to avoid in restraints
Avoid novelty restraints sold in gift-shop packaging — fluffy handcuffs, silk ties marketed as bondage, "beginner sets" that include both cuffs and a blindfold for under $15. The hardware on these is typically split-ring D-rings and single velcro strips that give out quickly. Also avoid metal police-style handcuffs: they have no padding, no give, and can cause nerve damage under pressure. They're not a beginner item regardless of price.
Connector: one piece of hardware
Buy a short length of chain or a single carabiner to connect wrist cuffs to each other or to a fixed point. Don't spend more than $10 here. A 12-inch connector chain with carabiner clips on each end handles most beginner restraint configurations. You don't need a full suspension rig to start — floor anchors, headboards, and carabiner-to-carabiner connections handle 90% of what beginners actually do.
Item 3: Blindfold
A blindfold is your highest-impact-per-dollar psychological tool. Removing sight amplifies everything else — touch, sound, anticipation, vulnerability. It's also completely reversible in two seconds and requires no technique. Every starter kit needs one.
What makes a good blindfold
The most important attribute is blackout. A blindfold that lets light in through the sides or bridge of the nose trains the receiver to peek and breaks immersion. Look for contoured cups or a flexible foam insert that presses gently against the eye sockets and blocks peripheral light completely.
Second attribute: adjustability. A one-size elastic strap that digs in after 10 minutes is uncomfortable in a way that doesn't serve the scene. Adjustable velcro or a buckle strap with multiple positions fits different head sizes and can be loosened slightly for extended wear.
Price bands — blindfolds
| Tier | Price | What you get |
|---|---|---|
| Budget | $8–15 | Sleep-mask style, adequate blackout if contoured, elastic strap |
| Mid | $18–30 | Padded cups, adjustable strap, full blackout, comfortable for extended wear |
| Premium | $35–60 | Leather hood or structured mask; overkill for a starter kit |
Recommendation: Budget to low-mid is fine here. A contoured sleeping mask from a travel accessories company often outperforms purpose-labeled "BDSM blindfolds" at 3x the price. Test it in daylight before a scene by wearing it and walking into a bright room — if you can see anything, it fails.
Item 4: Light Impact Tool (Paddle or Flogger)
Every starter kit needs one impact toy, and the choice between a paddle and a light flogger sets the direction of your early impact play experience. They're different enough that you should pick based on what interests you, not just buy both.
Paddle vs flogger for beginners
Paddle: More predictable. The impact surface is fixed and the sensation is consistent — thud or sting depending on material, covering a defined area. Easier to control precisely. Good for disciplinary dynamics and scenes with a Dominant/submissive power frame. Wooden or leather paddles give a different sensation signature; try both over time.
Light flogger: More variable and more forgiving. A suede or elk leather flogger with many thin tails distributes impact and produces a warm, thuddy sensation that many people find easier to enjoy as a first impact experience than the sharp sting of a paddle. See our full guide to choosing your first flogger for the full breakdown.
What to look for in a starter paddle
- Solid construction — no flexing in the handle, no delaminating surfaces
- Size: 6–10 inch striking surface for a beginner. Larger is harder to control; smaller requires more precision
- Material: leather or silicone for beginners. Wood paddles sting more and have less give — save those for later
- A handle that gives you grip confidence
Price bands — paddles
| Tier | Price | What you get |
|---|---|---|
| Budget | $15–25 | Pleather or vegan leather, adequate for learning; stitching may separate |
| Mid | $30–50 | Genuine leather or quality silicone; holds up to regular use |
| Premium | $60–120 | Artisan leather, weighted handle, longevity — not needed at starter stage |
Starting safe with impact
The standard beginner mistake with paddles is hitting too hard immediately. Start at 20% of what you think is appropriate. Ask for feedback. The sensation builds — what feels light at first lands differently after 10 strokes. Build up. Go down. Avoid the tailbone, spine, lower back, knees, and back of the knees. Established safe areas: buttocks, upper thighs, upper back (no vertebrae). Learn anatomy before you swing anything.
Items 5–6: Sensation Tools (Pinwheel + Candles)
Sensation play is one of the most accessible and underrated beginner categories. Two tools cover enormous ground: a Wartenberg pinwheel and drip candles.
Wartenberg pinwheel
Originally a neurological testing tool (still sold in medical supply stores), the pinwheel is a small roller with metal spines that rolls across skin producing a sensation that ranges from gentle tingle to sharp sting depending on pressure. It's safe on most areas of the body, easy to control, produces intense psychological effect without significant physical risk, and costs $8–15. Buy one. It will become one of your most-used tools.
The only care instruction: keep it clean. Wipe with isopropyl alcohol after contact with skin. Don't share between partners without sterilization. The spines can scratch skin at high pressure, so avoid very high pressure on sensitive areas until you've calibrated the sensation with your partner.
Drip candles
Wax play is a classic for a reason: it's dramatically effective, visually striking, and easy to calibrate. The key is buying the right candles. Do not use standard household pillar candles for wax play — they burn at too high a temperature and can cause burns, not just sensation.
Buy candles specifically designed for wax play (often called "low-melt" or "massage candles") or plain paraffin taper candles, which burn significantly cooler than soy or beeswax. Brighter-colored candles typically contain more additives that raise burn temperature; white or unscented varieties are safest for beginners.
Wax play safety basics:
- Start height high — 18–24 inches above skin. The drip cools significantly in that distance
- Test on your own inner wrist before using on a partner
- Avoid face, hair, and genitals until you're comfortable with heat calibration
- Have a bowl of cool water nearby
- Never leave an open flame unattended
- Have a plan for wax removal (plastic scraper or credit card works; never pull wax off dry skin)
A pack of 4–6 tapers runs $8–15. This is the highest sensation-per-dollar item on the whole list.
Item 7: Collar or Bondage Tape
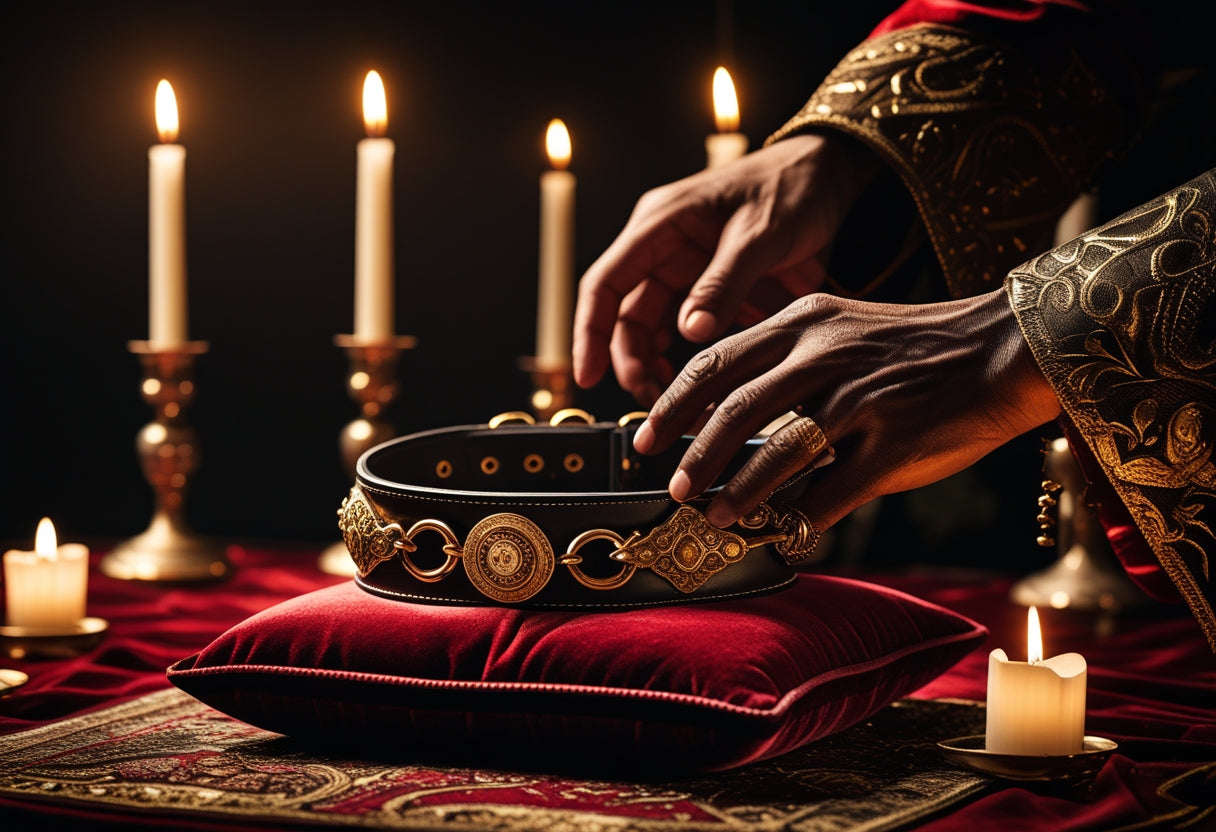
This slot is your first "choose based on your dynamic" purchase. If you're interested in D/s (Dominant/submissive) power exchange, a collar is significant symbolic and practical gear. If you're more interested in creative bondage configurations without the symbolic weight, bondage tape gives you more physical flexibility.
The starter collar
A beginner collar doesn't need to be a formal "collaring ceremony" piece — it can be a simple, well-made collar used as a scene prop and practical restraint point. Look for:
- Sturdy D-ring at the front for leash attachment or connection to overhead points
- Adjustable sizing — different people try on collars; get adjustable range
- Width of at least 1.5 inches for comfort during extended wear
- Padding or lining on the inside
- Buckle or snap closure with a quick-release option
A quality starter collar runs $20–35. Avoid very cheap collars with thin metal hardware or novelty designs — the hardware on these often fails when stressed. For the symbolic deeper meaning of collaring, see our formal collaring ceremony guide — this is just the practical gear conversation.
Bondage tape
Bondage tape (usually PVC or a self-adhering vinyl) sticks to itself but not to skin or hair, tears easily for quick release, and comes in rolls you can cut to any length. It's extremely versatile for improvised configurations and has no hardware to fail. A 65-foot roll runs $10–20 and handles many scenes before needing replacement.
Trade-off: Bondage tape is single-use (once stretched and applied, it loses adhesion). A quality pair of cuffs is indefinitely reusable. Both have a place; for a starter kit with a $200 limit, choose the one that fits your immediate interests.
Item 8: Quality Lubricant
Lube belongs in every kit regardless of whether penetrative play is on the agenda. It's used for toy play, reducing friction in rope bondage (yes, really), making certain sensation tools more effective, and it belongs in an aftercare kit for skin care after impact sessions. Buy a good one.
Types and trade-offs
| Type | Best for | Avoid with | Price (8oz) |
|---|---|---|---|
| Water-based | Silicone toys, latex, general use | Dries out faster; needs reapplication | $10–18 |
| Silicone-based | Long scenes, no reapplication; skin | Silicone toys (degrades them) | $15–25 |
| Hybrid | Balanced feel, moderate longevity | Check toy compatibility | $12–20 |
Recommendation: Water-based for a starter kit. Compatible with everything (including latex gloves if you use them), easy to clean, pH-neutral quality brands won't disrupt sensitive skin. Avoid glycerin-based formulas if either partner is prone to yeast infections. Buy a reputable brand (Sliquid, System JO, Überlube) — the $6 generic bottle is often thicker than it should be and contains irritants.
Item 9: Safety Scissors (EMT Shears)
This is the one item that is completely non-negotiable. Safety scissors — specifically EMT-style paramedic shears with a blunted safety tip — go in every kit before anything else. If you only own one thing on this list, own this.
Why EMT shears specifically
Regular scissors require you to angle the blade toward skin when cutting near restraints. EMT shears have a flat, blunt-tip blade designed to slide along the skin surface and cut without piercing. They can cut through rope, bondage tape, cuffs, clothing, and most restraint materials in seconds. A quality pair costs $8–15.
Keep them visible and accessible during every scene. Not in a drawer. Not in your bag. On the nightstand, on the floor next to the bed, on your belt if you're in that kind of dynamic. The moment you need them is not the moment to find them.
Care and replacement
EMT shears get dull with use. Test periodically by cutting a piece of fabric. When they start dragging rather than cutting cleanly, replace them. At $10, this is not a place to extend the lifespan of a compromised tool.
Item 10: Aftercare Kit
Aftercare is not optional. The physical and psychological drop that can follow intense play — sometimes immediately, sometimes days later — is real and well-documented. Having materials ready before it happens is part of responsible kit building.
Physical aftercare materials
- Blanket or throw: Body temperature drops after intensity; having something warm matters more than you'd expect
- Snacks and water: Blood sugar and hydration both dip during adrenaline response. Fruit, crackers, chocolate, juice — easy to consume without thinking
- Arnica gel or aloe: For areas that took impact or friction. Arnica is excellent for reducing bruising; aloe soothes heat in impact sites
- Small first aid kit: Band-aids, antiseptic wipes, basic supplies — especially important if rope, pinwheels, or impact are in the session
Psychological aftercare
The physical supplies are easy; this part matters more. Know before the scene what your partner needs afterward: physical contact or space, talking or quiet, reassurance or practical grounding. These preferences vary enormously between individuals and between sessions. Ask explicitly. Build into your session plan — don't treat aftercare as an optional add-on that happens if there's time.
Sub drop (the emotional low that follows intense play) can happen immediately or up to 72 hours later. Establish a check-in protocol with your partner: a text the next day, an agreement to reach out if something hits weird. This is care, not weakness.
Full Price Breakdown Table
| # | Item | Budget | Mid (recommended) | Note |
|---|---|---|---|---|
| 1 | Wrist cuffs | $20 | $40 | Don't skip to budget here |
| 2 | Ankle cuffs | $20 | $40 | Can match wrist set |
| 3 | Blindfold | $10 | $20 | Blackout quality > brand name |
| 4 | Paddle or light flogger | $20 | $40 | Choose based on interest |
| 5 | Wartenberg pinwheel | $8 | $15 | Medical supply stores often cheapest |
| 6 | Wax play candles (pack) | $8 | $15 | Low-melt or paraffin only |
| 7 | Collar or bondage tape | $15 | $30 | Choose based on dynamic |
| 8 | Quality lubricant | $12 | $18 | Water-based for starter kit |
| 9 | EMT safety scissors | $8 | $12 | Non-negotiable. Buy now. |
| 10 | Aftercare supplies | $15 | $25 | Blanket, snacks, arnica, first aid |
| Total (mid tier) | ~$136 | ~$255 | Mix tiers based on priority | |
If you're working with a strict $200 budget: buy mid-tier on restraints, safety scissors, and aftercare (highest safety impact); accept budget on blindfold, candles, and pinwheel (lowest safety risk); and choose mid-tier for your one impact tool. That prioritization nets you a complete, safe, functional kit.
What to Skip on Your First Buy
This section saves you more money than the recommendations. These are the things beginners frequently buy and regret.
Full bondage kits / box sets
The pre-assembled "starter BDSM kit" with six items in a box for $60 is almost always a collection of lowest-tier items in a category they've chosen for you. Individual items at mid-tier will always beat box sets of budget tier. Skip them.
Restraint systems requiring technique
Suspension hardware, under-bed restraint systems with multiple anchor points, hog-tie connectors — these are intermediate gear. You can't troubleshoot a complex restraint system while also managing a first scene. Start with cuffs and a single connection point.
Advanced impact: whips, canes
Single-tail whips and canes require trained technique to use safely. Whips can and do cause cuts at close range. Canes can cause nerve damage to the backs of knees or on bony areas if placed incorrectly. Neither belongs in a starter kit. Add them after you've taken a workshop or practiced with a mentor.
Electrostimulation devices
E-stim gear (violet wands, TENS units) is genuinely fascinating intermediate-to-advanced territory. It also has specific medical contraindications (pacemakers, certain medications, heart conditions) that require careful screening before use. Save it.
Gags
Ball gags and similar devices compromise both verbal safeword communication and, potentially, airway management. They belong in a kit only after you've established non-verbal safeword systems and practiced emergency protocols. Not a starter item despite their common appearance in starter-kit marketing.
Cleaning and Care Basics
Gear care is safety, not housekeeping. Unclean toys cause infections; deteriorating hardware fails at inconvenient moments.
After every scene
- Leather: Wipe with a slightly damp cloth; allow to dry completely before storing; condition with leather conditioner monthly with regular use
- Neoprene/fabric restraints: Machine wash cold on gentle cycle; air dry completely before storage — trapped moisture causes mildew
- Metal hardware: Wipe dry; check for sharp edges or deformation; replace if rings show any opening
- Silicone toys: Boil or dishwasher top-rack (no holes in the toy) for sterilization; soap and water for routine cleaning
- Pinwheel: Wipe with isopropyl alcohol; allow to dry fully
Storage
Store leather goods away from direct heat and sunlight — heat dries and cracks leather quickly. Store silicone items separately from other silicone items to prevent bonding (yes, this is a thing). Keep safety scissors somewhere accessible, not buried under everything else.
What to Buy First This Month
If you're starting from zero and want a concrete action plan:
- Week 1: EMT scissors ($10), water-based lube ($15), aftercare supplies ($20). Total: ~$45. Before you own a single piece of play gear, own your safety and care infrastructure. This is the rule.
- Week 2: Wrist cuffs, mid-tier ($40), blindfold ($15). Use these two items together for 2–3 sessions before adding anything else. Learn what you like before adding complexity.
- Week 3: Your one impact toy ($35) and ankle cuffs if wrist cuffs confirmed restraint is for you ($35). Or invest the $70 in a collar plus bondage tape if power exchange dynamics interest you more than physical bondage.
- Week 4: Wartenberg pinwheel ($12) and candles ($12). Round out sensation play only after you've established the foundation.
Total: ~$199. Every item chosen with purpose, no redundancy, full category coverage, safety infrastructure in place from day one.
See also:
- Beginner's Guide to BDSM Safety and Consent — read before buying anything
- How to Choose Your First Flogger — full breakdown for that impact toy decision
- Rope 101: Buying, Breaking In, and Caring for Your First Rope — if bondage rope interests you
- The Complete Guide to Kink Negotiation — before you use any of this gear
- Chastity Device Comparison — if chastity play is on your list
FAQ
Can I start with just one item instead of a full kit?
Yes — but include safety scissors no matter what you start with. A blindfold and a pair of quality wrist cuffs is a complete, meaningful starting point. You don't need all ten items to have a real scene. The kit framework is for people who want to build something comprehensive from the start.
Should I shop at specialty stores or use general retailers?
Specialty kink retailers (Tantus, Stockroom, Leather Etc., local leather shops if you have them) tend to have better quality control and more honest product descriptions. General marketplaces have more variety at lower prices but also more junk mixed in. For hardware items like cuffs and safety scissors, specialty or Amazon with careful reviews. For candles and basic sensation items, any reputable source works.
My partner is new to this. How do I introduce gear without overwhelming them?
One item per session, early on. A blindfold alone is a full scene. Wrist cuffs plus a blindfold is another full scene. Add items as comfort and curiosity build together, not all at once. The gear is just tools — the dynamic is what matters.
What's the most common first-kit mistake you see?
Buying too many impact toys and no safety or sensation gear. People get excited about paddles and floggers and buy three variations, then realize they have nothing for the rest of the scene and no EMT scissors for emergencies. Build the full kit before deepening any single category.
Do I need to disclose my kit to partners before play?
Disclosure and negotiation go together. Before any scene, your partner should know what tools you might use and consent to each category. This isn't a formality — it's foundational. See the negotiation guide linked above. The conversation about what's in the toy bag is part of the scene's negotiation, not an afterthought.
Is $200 really enough for a complete kit?
At mid-tier pricing, $200 gets you a fully functional kit that covers all four play categories plus safety. It's not the kit of a veteran player — those grow over years. But it's everything you need for a first year of exploration, and probably several years beyond that if you're not expanding into specialist areas. Buy less and buy better rather than filling the space with budget gear.